Front Wiring Harness Protector No. 1
- Disconnect the negative battery terminal. (See NEGATIVE BATTERY TERMINAL DISCONNECTION/CONNECTION
.)
- Remove the air cleaner assembly. (See INTAKE-AIR SYSTEM REMOVAL/INSTALLATION (VIN M)
.)
- Insert a tape-wrapped Flathead screwdriver into the service hole in the position shown in the figure. (
SKYACTIV-G 2.5
)
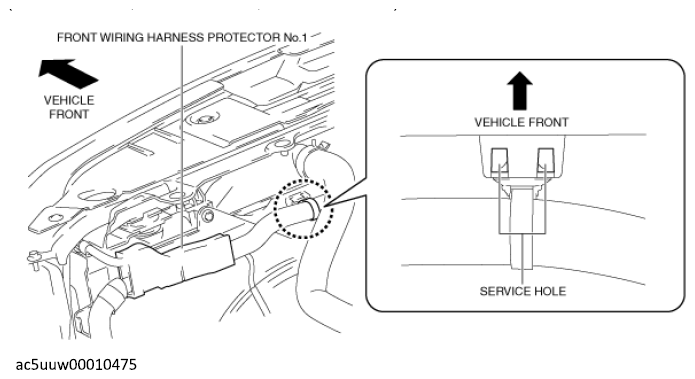 Courtesy of MAZDA MOTORS CORP.
- While pressing the tabs of clip A in the direction of the arrows (1) shown in the figure, pull clip A in the direction of the arrow (2) shown in the figure to detach the tab of clip A from the radiator. (
SKYACTIV-G 2.5
)
 Courtesy of MAZDA MOTORS CORP.
- Detach clip A. (
SKYACTIV-G 2.5
)
- While pressing the tabs of clip B in the direction of the arrows (1) shown in the figure, pull clip B in the direction of the arrow (2) shown in the figure to detach the tab of clip B from the front bumper.
 Courtesy of MAZDA MOTORS CORP.
- Remove clip B.
- While pressing the clip tabs in the direction of the arrows (1) shown in the figure, pull the clip in the direction of the arrow (2) to detach the clip tabs from the radiator.
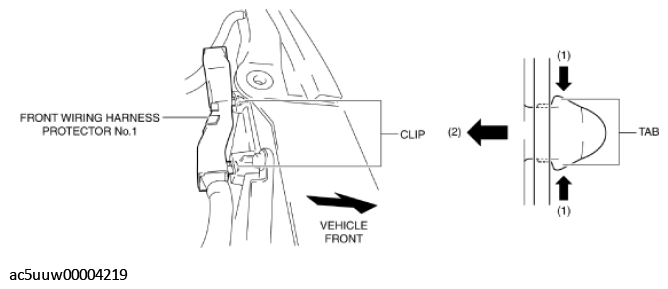 Courtesy of MAZDA MOTORS CORP.
- Detach all the clip tabs and remove the clips.
- Insert a Flathead screwdriver into the position shown in the figure.
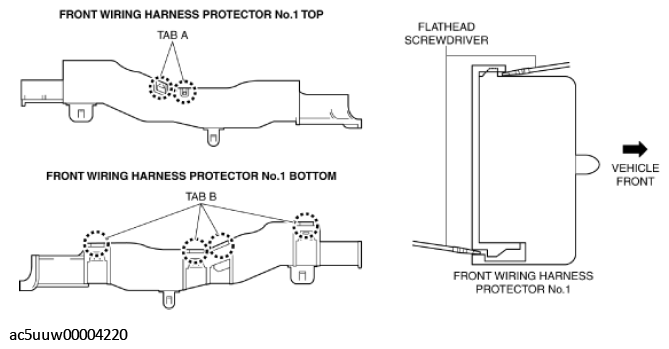 Courtesy of MAZDA MOTORS CORP.
- While lifting up the hooks in the direction of the arrows (1) shown in the figure using a Flathead screwdriver, pull the hooks in the direction of the arrows (2) shown in the figure to detach the tabs from the hooks.
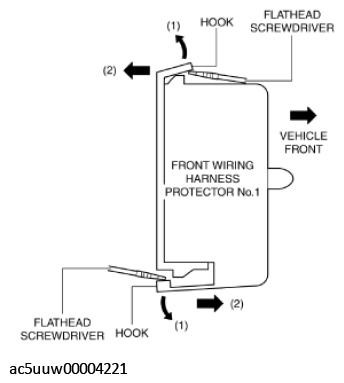 Courtesy of MAZDA MOTORS CORP.
- Detach all the tabs and hooks and remove front wiring harness protector No. 1.
- Install in the reverse order of removal.