Removal (Metro)
- Disconnect negative battery cable at battery and transaxle. Disconnect clutch cable from release lever. Disconnect wiring harness clamps and connectors.
- Disconnect speedometer cable. Remove upper transaxle-to-engine bolts. Remove starter motor and starter motor retaining plate. Disconnect vacuum hoses.
- Install engine support. Raise and support vehicle. Drain transaxle fluid. Disconnect gearshift control shaft bolt and nut. Disconnect control shaft from gearshift shaft.
- Remove extension rod bolts, nuts and washers. Remove exhaust pipe front and rear flange nuts and bolts. Remove clutch housing lower plate. Remove left front wheel.
- Disconnect left tie rod. Disconnect left ball joint by removing ball joint stud bolt. Disconnect drive axles from transaxle. See FWD AXLE SHAFTS article in DRIVE AXLES. Remove transaxle-to-engine nuts and bolts.
- Support transaxle with jack. Remove rear engine mounting nuts. Remove nuts and bolts securing left transaxle mounting bracket. Remove left transaxle mounting bracket.
- Lower engine and transaxle enough to remove rear engine mounting through bolt. Pull transaxle straight out toward left side and disconnect input shaft from clutch cover. Lower transaxle assembly.
- Mark pressure plate and flywheel for reassembly reference. Install clutch centering tool to support clutch assembly. Loosen pressure plate-to-flywheel bolts evenly (one turn at a time) until spring pressure is released. Remove pressure plate-to-flywheel bolts. Remove pressure plate and clutch disc. See Fig 1
.
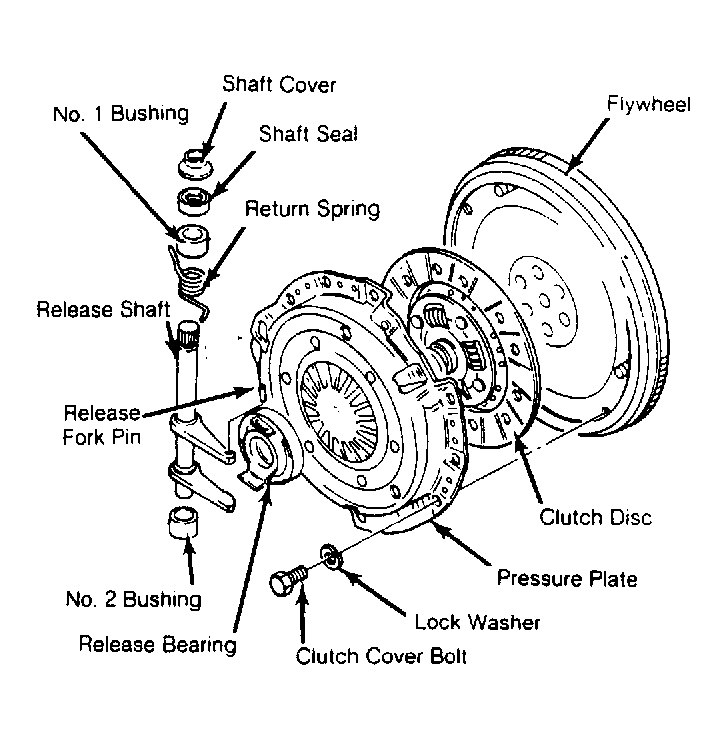 Courtesy of GENERAL MOTORS CORP.